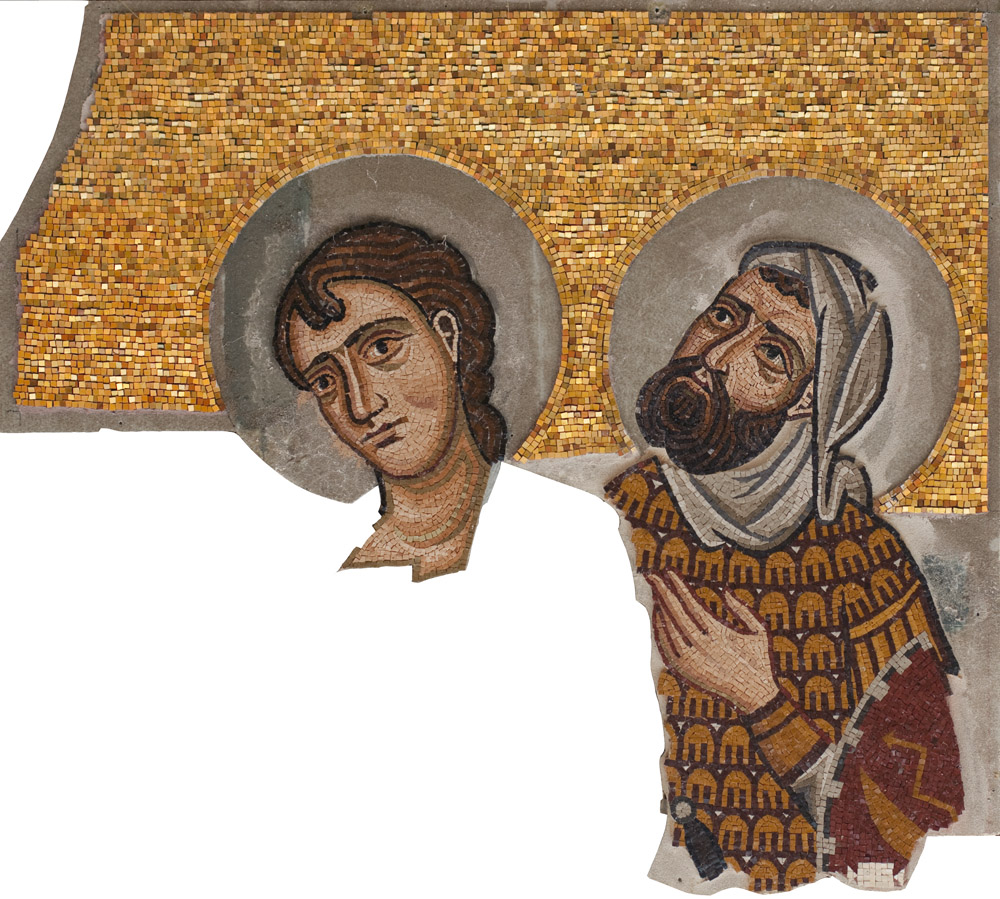
During the Byzantine era there were only handful of places in the world able to produce glass situated in the Middle East. The mysterious transformation of silica, mineral soda and lime took place under intense heat in gigantic furnaces built for each firing and then demolished. Raw chunks of this prized, transparent substance were transported around the world, as far as Japan even, where they were re-worked in local centres. For the glass tesserae, or ‘smalti’, used in Byzantine mosaics this raw glass was re-melted and coloured with different metal and oxide additives before being formed into small ‘cakes’ which were then cut to size. No definite centres of the production of these glass cakes have been identified, but it is probable that some were produced in furnaces on site, near the mosaicists as they worked – like giant alchemical artists’ palettes.
We order our tesserae from the Orsoni foundry in Venice and, cutting each one to size as we work, apply them onto panels made from ‘Aerolam’ – a very light and rigid aluminium centred board used in the aircraft industry. We glue a layer of aggragate onto these panels which gives the mortar something extra to lock into. For simpler areas of mosaic, like gold backgrounds and buildings, we work directly onto the panel, pushing the tesserae into a cement based mortar. For more complex areas, like flesh and garments, where we need an adhesive with a longer open time, we use the ‘Ravenna Double Positive Method’ which is described here.
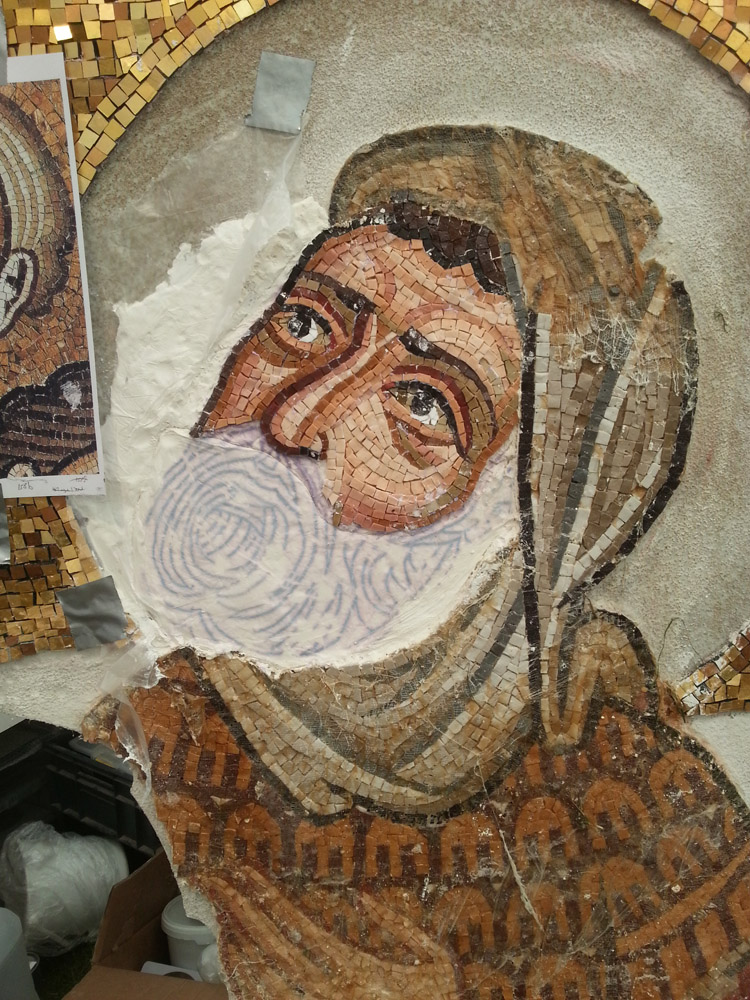
1. We begin by transferring our drawing onto the lime putty using glassine paper and a water soluble felt tip. As well as the main features of the face or garment, we also trace the all important andamento – the lines of flow that the tesserae will be arranged in that give the mosaic form and movement.
Using lime putty, which has a long open time, as our initial base gives us time to adjust the tesserae as we progress. This is particularly important in a face where every tesserae contributes towards the overall expression.
As lime putty is inherently brittle and our mosaic panels will be handled and moved around, we now begin the process of transferring the mosaic onto a stronger and more flexible cement based mortar.
2. After final adjustments have been made, a thin gauze is glued onto the surface of the mosaic with a water soluble pearl glue.
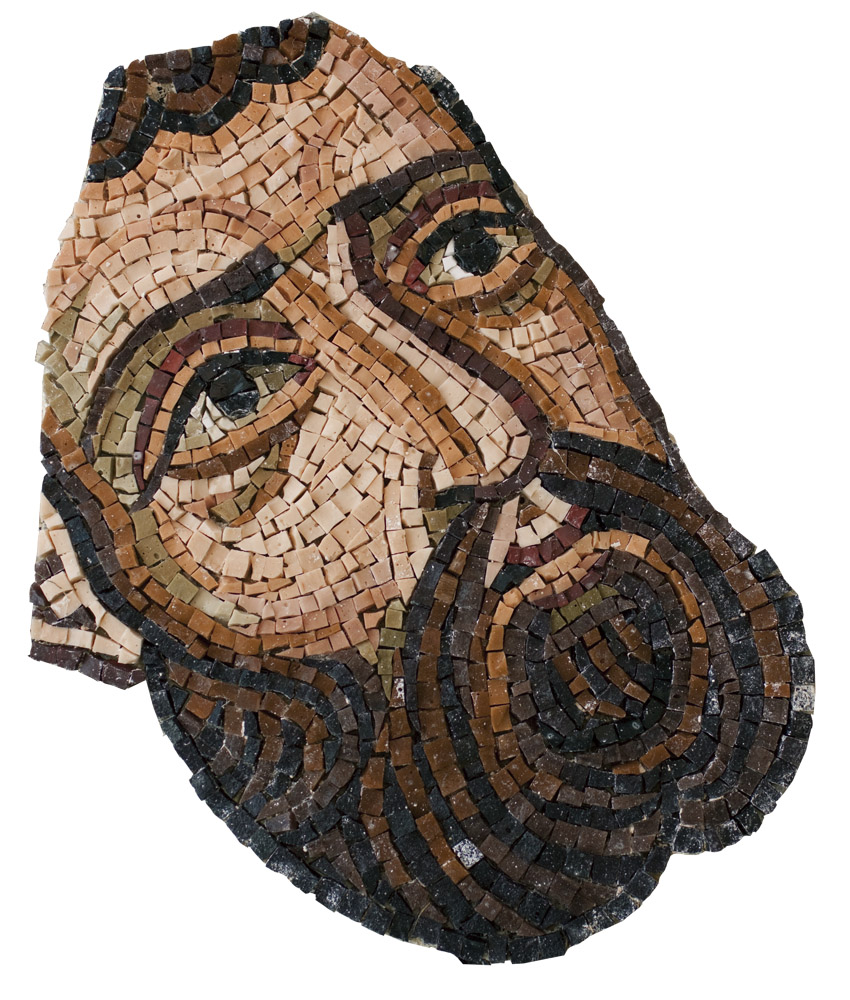
3. When the glue is set after a day or so we hold our breath and lift the tesserae, which are now hopefully attached to the gauze, away from the surface of the board. Using a pressure washer any remaining lime putty is washed away from the back of the tesserae – revealing the reverse side of the mosaic.
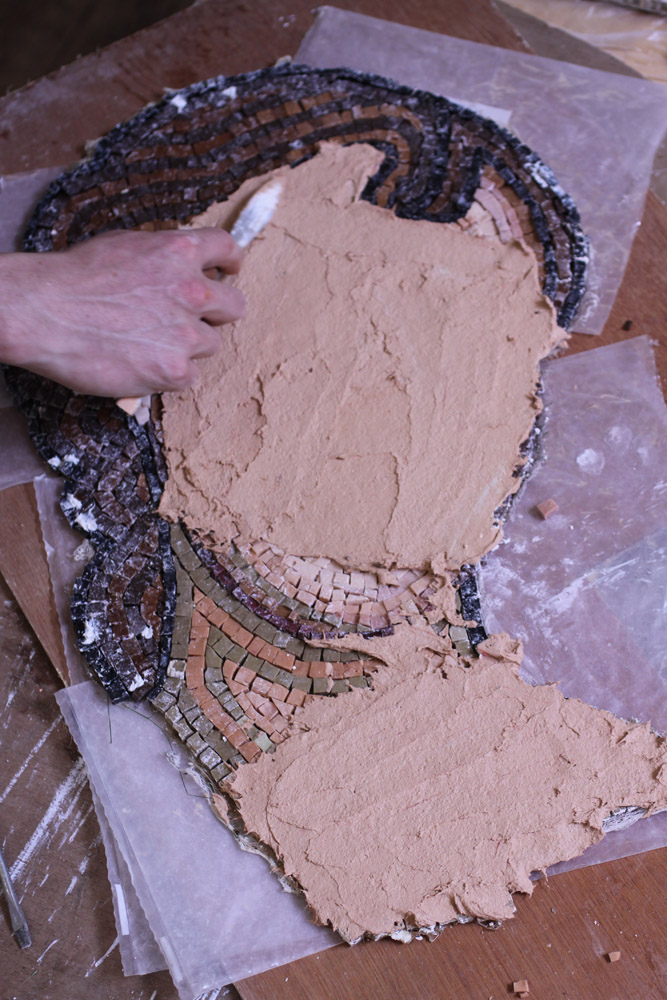
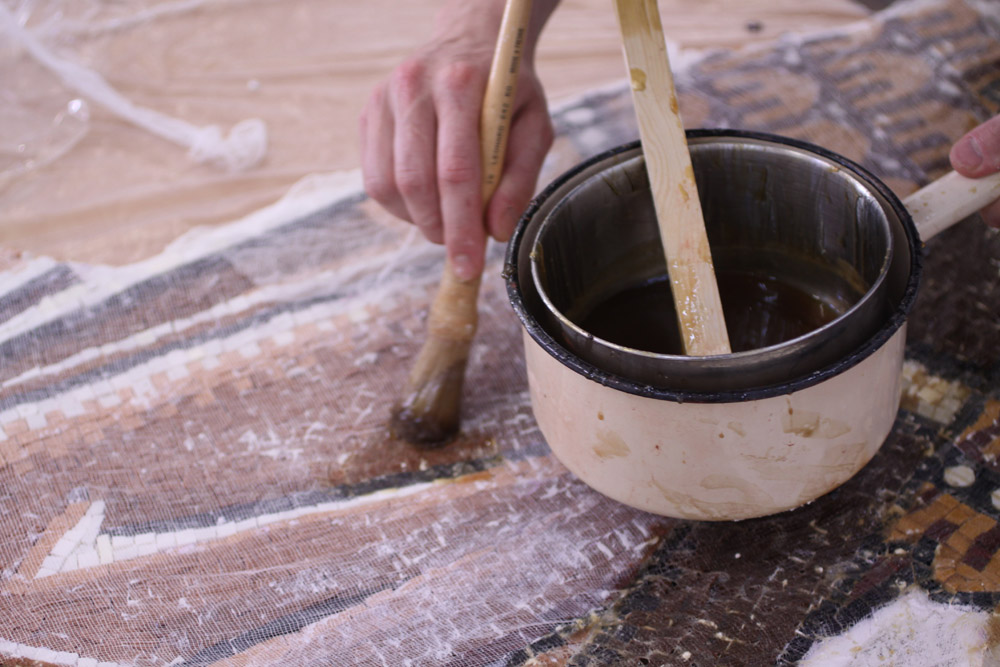
4. There is evidence that Byzantine and Medieval mosaicists frescoed the basic forms and colours on onto the lime mortar before laying their tesserae. As well as providing the design this had the added benefit of colouring any mortar that remained visible between the tesserae. We recreate this effect by applying a layer of cement based mortar coloured with natural pigments to the reverse side of the mosaic before reapplying it to board.

5. Working quickly before the mortar begins to stiffen and set, the mosaic is flipped over and reapplied to the board – which has also had a thin layer of cement based mortar added to it. We wait a couple of weeks to allow the mortar to set completely, then remove the gauze from the surface of the tesserae by pouring on hot water which loosens the pearl glue.